AeroPress Coffee Maker: How It Works, Pros, Cons, and Alternatives
The AeroPress has sold over six million units worldwide since Alan Adler introduced it in 2005 — a striking number for a brewer that fits inside a carry-on bag. If you've been trying to make sense of the AeroPress coffee maker pros and cons, this guide lays it all out. You'll learn exactly how it brews, what it does brilliantly, where it struggles, and how it compares to other popular methods — including many covered in our pour over and drip brewing section.
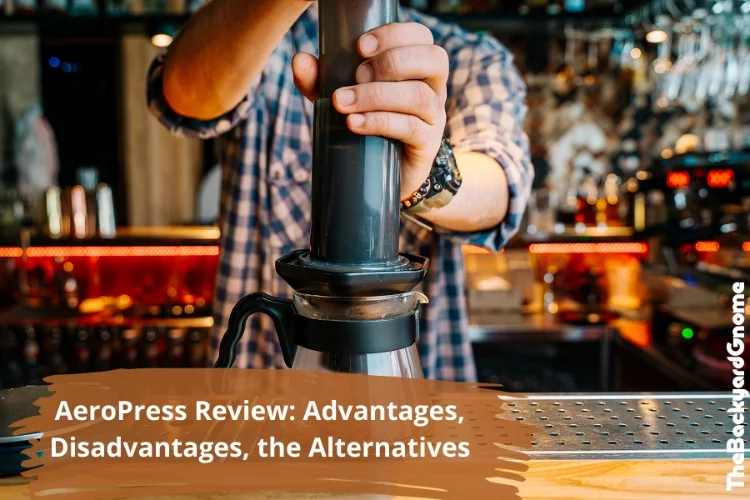
Alan Adler, the same engineer behind the Aerobie flying ring, built the AeroPress with simplicity in mind. You steep coffee grounds in a cylindrical chamber, then press a plunger through — pushing the brew past a microfilter into your mug. The whole process takes about two minutes, and cleanup is even faster.
The device has inspired genuine enthusiasm in the coffee world. According to Wikipedia, the World AeroPress Championship has been running since 2008 and now draws competitors from more than 60 countries. For a $35 piece of plastic, that's a pretty extraordinary legacy.
Contents
Brewing with an AeroPress: A Step-by-Step Guide
One reason the AeroPress has such a devoted following is that it rewards experimentation. There's no single correct recipe — serious enthusiasts have published thousands of variations, and the World AeroPress Championship produces a new winning method every year. That said, a solid baseline will get you great results immediately, even on your very first brew.
What You'll Need
The equipment list is short. The AeroPress comes with a scoop and stirrer, so the only additional gear you need to source separately is a decent grinder and a kettle. Here's what to gather before you start:
- AeroPress brewer and plunger
- Paper or metal AeroPress filter
- Coffee ground medium-fine — similar in texture to table salt
- Water heated to around 175–205°F (off the boil by about 30–60 seconds)
- A sturdy mug or small decanter
Grind consistency matters more than most beginners expect. Too coarse and your coffee finishes weak and sour. Too fine and the plunge becomes a workout — and your cup turns bitter. If you're still dialing in your setup, our guide on the best coffee grinder for French press covers grind consistency principles that apply just as well to AeroPress brewing.
The Standard Method
Place a paper filter in the cap and rinse it with hot water to eliminate any papery taste. Attach the cap to the chamber and set it over your mug. Add about 17 grams of ground coffee — roughly one rounded AeroPress scoop — then pour in 250ml of hot water. Stir for 10 seconds and let it steep for another 60–90 seconds. Then press the plunger down slowly and steadily over about 30 seconds. Stop pressing the moment you hear a hissing sound — that's air, not more coffee.
Pro tip: Use a kitchen scale instead of the included scoop. Even small inconsistencies in dose affect the flavor more than you'd expect.
The Inverted Method
The inverted method flips the AeroPress upside down during steeping, which prevents any drip-through before you're ready to press. It gives you complete control over steep time and is popular in championship-level recipes. The tradeoff is a confident, steady flip once steeping is done — something that takes a little practice to feel comfortable with. Both approaches produce excellent coffee; the standard method is simply more forgiving if you're new to it.
AeroPress Coffee Maker Pros and Cons: The Full Picture
No brewer suits everyone equally, and the AeroPress is no exception. Understanding the real AeroPress coffee maker pros and cons before buying will save you from disappointment — or confirm it's exactly what you've been looking for.
What the AeroPress Does Well
The AeroPress produces a remarkably smooth, full-bodied cup with lower acidity than drip or pour over methods. The paper filter catches most oils and fine particles, which is useful if you have a sensitive stomach. It's also unusually forgiving — unlike espresso, small variations in grind size or ratio don't ruin the cup. You have real room to experiment.
Portability is another genuine strength. If you've ever wanted great coffee while camping or traveling, the AeroPress is hard to beat. Our hands-on look at brewing with an AeroPress in the outdoors covers how well it performs in real-world travel conditions. It's lightweight, nearly indestructible, and requires no electricity whatsoever.
Worth knowing: The AeroPress works with almost any heat source — a camp stove, an electric kettle, or even water heated on a stovetop. That flexibility is rare at this price.
Where It Falls Short
The AeroPress only brews one cup at a time. You can dilute the concentrate it produces to make an Americano-style drink, but you're still working in single-cup batches. If you're regularly serving a household of four, this isn't the right tool for the job.
It also doesn't produce true espresso, despite what some marketing language implies. The manual pressure you generate is nowhere near the 9 bars an espresso machine uses. You'll get a strong, concentrated brew — pleasant on its own — but don't expect to pull shots for lattes. And if you rely on paper filters, you'll need to keep them stocked; running out on a Monday morning is its own kind of frustration.
How the AeroPress Stacks Up Against Other Brewers
Context helps when evaluating any piece of equipment. Here's a side-by-side look at how the AeroPress compares to three popular alternatives across the criteria that matter most to home brewers.
| Brewer | Brew Time | Cups per Batch | Acidity Level | Price Range | Portability |
|---|---|---|---|---|---|
| AeroPress | ~2 min | 1 | Low | $35–$50 | Excellent |
| French Press | ~4 min | 1–8 | Medium-High | $20–$80 | Good |
| Pour Over (V60/Chemex) | ~3–5 min | 1–4 | Medium | $15–$60 | Moderate |
| Espresso Machine | ~25–30 sec shot | 1–2 | High | $200–$2,000+ | Poor |
AeroPress vs. French Press
Both brewers are manual, affordable, and produce full-bodied coffee — but the differences are meaningful. The French press uses no paper filter, so more oils stay in the cup for a richer, heavier mouthfeel. It also handles larger batches with ease. The AeroPress produces a cleaner result with less sediment. If you enjoy both styles, our walkthrough on how to make French press coffee is a solid companion read. Choose the French press for volume; choose the AeroPress for precision and portability.
AeroPress vs. Pour Over and Espresso
Pour over methods like the V60 and Chemex produce a bright, clean, tea-like cup that highlights a coffee's origin characteristics. They reward patience and careful technique. The AeroPress is more forgiving and significantly faster. Against an espresso machine, there's no real competition on pressure or crema — but the AeroPress costs a fraction of the price and delivers a satisfying strong cup that pairs well with milk. What bean you choose also shapes the result considerably; our guide to the best Arabica coffee beans covers roast profiles worth trying in an AeroPress.
Mistakes That Ruin Your AeroPress Coffee
Even with a forgiving brewer, a few recurring mistakes will flatten your results. The good news is most of them are easy to correct once you know what to watch for.
Getting the Grind Wrong
Grind size is the single biggest variable you control in AeroPress brewing. Most beginners start too coarse, which produces weak, sour coffee that flows through too quickly. Medium-fine — finer than pour over, coarser than espresso — is a reliable starting point. If your plunger takes almost no effort to push, go finer. If pressing feels like a serious workout, go coarser. Make one adjustment at a time.
Warning: Pre-ground grocery store coffee is usually too coarse for an AeroPress. Grinding fresh immediately before brewing makes a noticeable difference in flavor clarity.
Water Temperature and Steep Time
The AeroPress tolerates a wider temperature range than espresso, but boiling water tends to over-extract lighter roasts and introduce harsh bitterness. Aim for 185–205°F depending on roast level — lighter roasts can handle higher temps, darker roasts benefit from slightly cooler water. Steep time matters too: going past 90 seconds without adjusting your grind finer often leads to over-extraction. Keep a timer close until your process is fully locked in.
Keeping Your AeroPress Clean and Ready
One of the AeroPress's most underrated advantages is how easy it is to maintain. The design practically cleans itself after every use, which matters when you're brewing every single morning.
Daily Habits
After pressing, pop the filter cap off, hold the AeroPress over a trash can, and push the plunger through. The spent puck of coffee ejects cleanly in one firm push. Rinse the rubber seal and chamber under warm water. That's genuinely all you need to do. No soaking, no scrubbing, no specialty cleaning products required. The entire rinse takes under a minute, which makes the AeroPress feel effortless compared to a French press or espresso machine.
Long-Term Care
Every week or so, take a closer look at the rubber seal. Over time it can accumulate faint coffee residue that wipes away easily with a damp cloth. The AeroPress is also dishwasher-safe on the top rack if you want a deeper clean. One thing to avoid: don't store it assembled with the plunger fully compressed for extended periods, as this can deform the rubber seal over time. Store it disassembled and it will last for years without issue. Replacement seals are sold cheaply by Aeropress Inc. if yours ever wears down.
Frequently Asked Questions
Is the AeroPress good for beginners?
Yes — it's one of the most beginner-friendly manual brewers available. The standard method is simple, the equipment is affordable, and small mistakes don't ruin the cup. Most people produce a genuinely good result on their very first attempt.
Can the AeroPress make espresso?
Not true espresso. It produces a strong, concentrated brew that resembles espresso in some ways, but the manual pressure you generate — roughly 0.35–0.75 bar — falls well short of the 9 bars a proper espresso machine uses. You won't get authentic crema from an AeroPress.
What grind size is best for AeroPress?
Medium-fine is the standard starting point — similar in texture to table salt. Adjust from there based on taste: finer for a stronger, richer result; coarser for something lighter and brighter. Grind consistency matters more than any specific setting on your grinder.
How long does an AeroPress last?
The polypropylene body is nearly indestructible under normal use and should last well over a decade. The rubber seal is the one component that wears down over time, but replacements are inexpensive and easy to install. Many longtime users report using the same AeroPress for five to ten years or more.
Does the AeroPress work without paper filters?
Yes — metal reusable filters are a popular alternative. They allow more oils to pass through, producing a fuller-bodied cup with slightly more sediment. Paper filters deliver a cleaner result with lower acidity. Which you prefer comes down to personal taste, and many AeroPress owners keep both types on hand.
What's the difference between the standard and inverted AeroPress methods?
In the standard method, the AeroPress sits upright on your mug during steeping, which allows a small amount of drip-through before you press. The inverted method keeps the brewer upside down until you're ready to press, giving you full control over steep time. Both methods can produce excellent coffee — the standard is more forgiving, the inverted gives you more precision.
Key Takeaways
- The AeroPress coffee maker pros and cons point to a fast, portable, and forgiving brewer that excels for single-cup brewing but can't match an espresso machine's pressure or a French press's batch capacity.
- Grind size and water temperature are the two variables that most affect your cup — dial those in first before experimenting with ratios or steep times.
- Cleanup takes under a minute after every use, and the brewer itself will last for years with minimal maintenance as long as you store it disassembled.
- For travelers, campers, or anyone who wants precision and portability in a compact package, the AeroPress remains one of the best values in coffee equipment at its price point.


About Bryan Albuquerque
Bryan Albuquerque has been passionate about coffee for over a decade, developing hands-on experience with a wide range of home brewing equipment and grinding methods through years of daily practice and systematic testing. His focus is on the grinder side of coffee — burr geometry, grind consistency, retention, and how equipment choices affect extraction across different brewing methods. At KnowYourGrinder, he covers coffee grinder reviews, grind settings guides, and brewing advice for home baristas looking to improve their cup quality.
Get FREE Coffee Gifts now. Or latest free grinders from our best collections.
Disable Ad block to get all the secrets. Once done, hit any button below